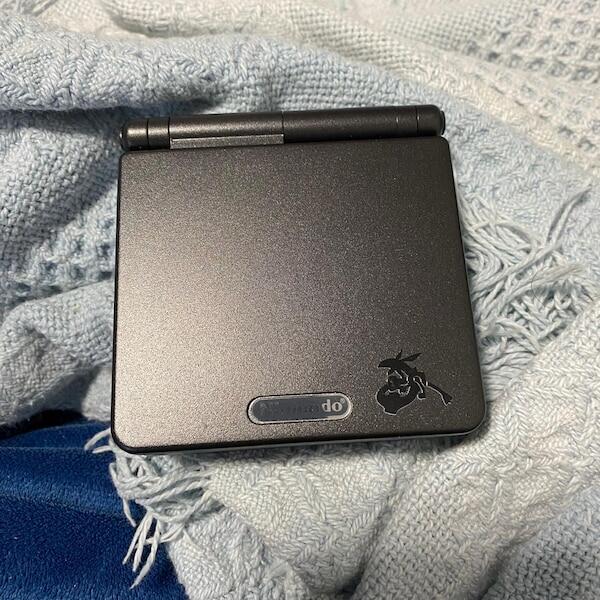

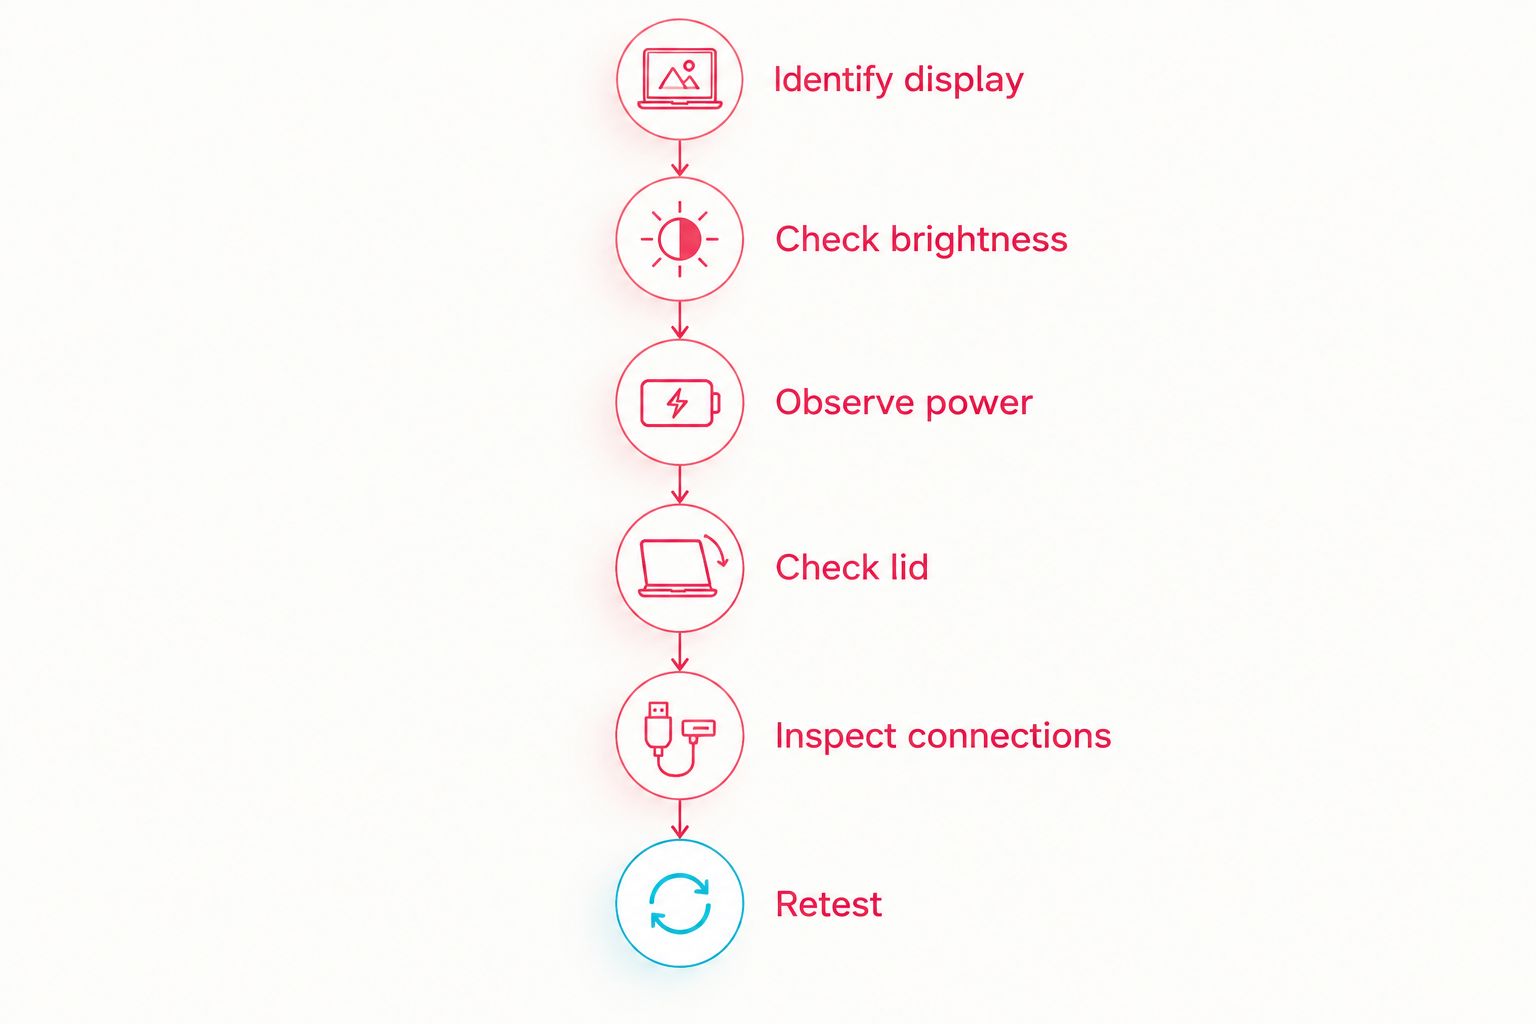
To fix a dim or flickering Game Boy Advance SP screen, identify the installed display, check its brightness control, then separate a screen fault from unstable power or a damaged display connection. Replace parts only after those checks identify the fault; stop using the console if the battery is swollen, leaking or unusually hot.
- Game Boy Advance SP dim flickering screen fix: identify the display before replacing parts.
- Nintendo AGS-001 frontlighting looks different from AGS-101 backlighting; dimness alone does not prove a fault.
- Flickering with resets needs power checks; flickering during lid movement needs display-connection inspection.
- Retrofit offers Game Boy Advance SP repair and upgrade services for owners who want professional work.
Why this matters
A brighter replacement screen does not repair a failing power switch, damaged connector or unstable battery supply. Buying a display first can leave you with the original fault and another component to troubleshoot.
For a secondhand console in 2026, start with its condition and modification history. The Game Boy Advance SP secondhand testing guide covers the broader checks that belong alongside screen diagnosis.
How do you fix a Game Boy Advance SP with a dim or flickering screen?
Use this order: identify the screen, check brightness, observe power behaviour, check lid movement, then inspect internal connections if you have the skills. Each step narrows the problem without assuming that the LCD itself has failed.
1. Identify the display
Read the model label underneath the console, then check whether the screen has been replaced. An AGS-001 originally uses a frontlit display; an AGS-101 originally uses a backlit display. A replacement shell or previous modification means the label alone cannot identify the screen currently fitted.
The original Game Boy Advance SP display has a resolution of 240 × 160 pixels and a 2.9-inch diagonal. Those specifications describe the stock display, not every aftermarket IPS kit. Do not identify a modification from shell colour or apparent brightness alone.
Ask the previous owner for the screen-kit name, installation instructions and any repair history. If that information is unavailable, record what the brightness button actually does before opening the console.
2. Check brightness without opening the console
On an original AGS-001, the brightness button switches the frontlight on and off. On an original AGS-101, it switches between 2 brightness settings. An IPS modification can use a different control arrangement, so follow the instructions for the installed kit.
Test in steady indoor lighting with the console resting on a table. Compare the same game scene at each supported setting. A consistently dim image is a different symptom from illumination that pulses or cuts out.
Do not hold unfamiliar button combinations or touch controls repeatedly without knowing their function. Some aftermarket displays have settings beyond brightness, and accidental changes can complicate the diagnosis.
3. Separate dimness from power instability
Watch the power indicator and listen to the game while the screen flickers. Note whether the console resets, audio stops or the indicator changes at the same moment. A screen symptom accompanied by a reset needs power diagnosis, not an automatic screen replacement.
Check the battery compartment with the console switched off and the charger disconnected. Stop if the battery is swollen, leaking, damaged or unusually hot. Do not press a bulging battery flat, puncture it or continue charging it.
The original SP battery is a lithium-ion pack rated at 3.7 volts nominal. That rating is not a universal compatibility instruction: use a replacement explicitly intended for your console and its installed power modifications.
4. Observe normal lid movement
With the console running and resting securely, open the lid gently through its normal range. Record whether the image or illumination changes at a particular position. Do not twist the lid, force the hinge or keep repeating a movement that causes the display to cut out.
The display ribbon passes through the hinge area. A repeatable change with lid position is a reason to inspect that cable path and its connections, but it does not prove which component has failed. A damaged hinge also needs attention before a new display is installed.
5. Inspect connections only with power disconnected
Internal inspection is for owners comfortable with handheld disassembly and fragile ribbon connectors. Switch off, unplug the charger and remove the battery before working. Use correctly fitting screwdrivers and a model-specific disassembly guide; stop rather than stripping a screw or forcing the case.
Inspect the display ribbon for tears, sharp creases and uneven insertion at the motherboard connector. Check the connector latch for damage. On a modded console, also inspect the kit's adapter connections, insulation and any installed wires against that kit's instructions.
Reseating is appropriate only when the cable and connector are intact and you understand the latch mechanism. Never pull a locked ribbon or push it into place with a metal tool. If the connector is broken, further handling can make the repair harder.
6. Retest before replacing anything else
After a safe adjustment, reassemble the console sufficiently for a controlled test. Check the same game scene, brightness setting and normal lid positions used earlier. Change one variable at a time so you know which action changed the symptom.
If the fault remains, stop replacing parts by guesswork. A repairer can check the power path, display connection and screen assembly separately. Board corrosion, damaged connector pads and intermittent switches require a different repair from fitting a new LCD.
Original AGS-001: check the frontlight first
Best for: owners preserving an original frontlit console. The AGS-001 lights the screen from the front, so its appearance differs from a backlit SP. A stable, less vivid image is not enough evidence to condemn the LCD.
Check whether the light switches on and whether the image remains visible under room lighting when it is off. If the game image continues normally but illumination cuts out, record that distinction for the repairer. It separates an illumination symptom from a complete loss of picture.
Keeping the original screen preserves the console's display configuration. The trade-off is that repairing it will not turn frontlighting into backlighting. Choose restoration because you want the original display, not because you expect IPS-style presentation.
Original AGS-101: compare both brightness settings
Best for: owners who want to retain an original backlit SP. The AGS-101 brightness button selects between 2 brightness settings. Compare both before treating a dim screen as a hardware failure.
If one setting behaves differently, record exactly what happens: stable dimness, pulsing illumination or a complete blackout. Do not assume the button, battery or LCD is responsible from that observation alone. The point is to give the next inspection a repeatable symptom.
Preserving the original backlit display avoids an unnecessary conversion. Its limitation is that a replacement must suit the console's actual hardware; an AGS-001 display and an AGS-101 display are not interchangeable without the appropriate supporting arrangement.
IPS-modified SP: identify the kit before adjusting it
Best for: owners troubleshooting an existing screen upgrade. In 2026, an SP advertised as IPS-modified still needs its exact kit identified. Brightness controls, adapters, wiring and installation requirements differ between kits.
Check the installation documentation before adjusting wires or changing settings. Pay particular attention to ribbon seating, insulation and whether the shell presses on installed components. A fault that started immediately after a modification warrants inspection of that installation before another screen is ordered.
An IPS upgrade changes the display, not the condition of every original component. Its benefit is a modern screen; its drawback is an additional installation that must be correct. A new panel cannot compensate for a damaged power switch or broken motherboard connector.
Which display path fits your goal?
| Display path | Best for | Main advantage | Main limitation |
|---|---|---|---|
| Retain AGS-001 frontlighting | Original-hardware collectors | Preserves the original display configuration | Retains the frontlit appearance |
| Retain AGS-101 backlighting | Owners preserving an original backlit SP | Keeps the original backlit setup | Requires compatible hardware and a sound connection |
| Repair an existing IPS installation | Owners whose modified screen has developed a fault | Addresses the installed system rather than replacing it blindly | Requires the exact kit instructions |
| Install an IPS upgrade | Players deliberately choosing a modern display | Changes the screen presentation | Does not repair unrelated power or motherboard faults |
Choose the repair path from the fault and your goal, not from the brightest product photograph. For a 2026 repair, establish what is installed before deciding what should replace it.
Why the right screen fix varies
The same description—dim or flickering—can refer to different observations. These factors determine the next useful check:
- Display type: frontlit, original backlit and aftermarket IPS screens have different controls and supporting hardware.
- Power behaviour: a simultaneous reset or interruption to sound calls for power-path checks as well as display checks.
- Lid position: a repeatable change during normal opening calls for hinge-area cable and connection inspection.
- Previous work: a recent screen conversion or shell replacement makes installation details relevant.
- Physical condition: corrosion, a damaged latch or a torn ribbon changes the repair from adjustment to component work.
- Brightness response: a stable difference between supported settings is not the same as unpredictable flickering.
Write these observations down before sending the console for repair. A useful description is specific: the image disappears during normal lid movement while audio continues. A vague description such as bad screen leaves the important distinctions unresolved.
Should you adjust the screen potentiometer to stop flickering?
Do not turn a motherboard adjustment blindly. Advice for one original display configuration does not automatically apply to another configuration or an IPS modification.
Adjustment without identifying the circuit and following the relevant service procedure adds another variable. Leave it to a repairer who can assess the display signal and power supply. It is not a substitute for checking a damaged ribbon or unstable battery connection.
Will replacing the screen definitely fix the flicker?
Screen replacement fixes a screen fault, not every fault that appears on the screen. A damaged display assembly needs a compatible replacement, while unstable power or a broken connector needs its own repair.
For an IPS upgrade in 2026, ask the installer to distinguish the existing fault from the proposed display change. Your acceptance test should include brightness operation, uninterrupted gameplay and normal lid movement—not simply whether the new panel lights up.
When should you use a professional repair service?
Use professional repair when you find corrosion, a broken connector latch, a torn hinge ribbon or a fault that persists after safe external checks. Stop disassembly if you cannot identify the installed kit or release its connectors without force.
Retrofit is best for Australian Game Boy Advance SP owners who want professional repair or a refurbished console instead of DIY board work. Retrofit provides repair and upgrade services alongside professionally refurbished and modded Game Boy Advance consoles.
The advantage is a professional repair path rather than learning on fragile hardware. The trade-off is that you are handing over the repair, and an upgrade changes the original configuration. State whether your priority is preserving the stock display or moving to an IPS screen before authorising work.
FAQ
Why is my Game Boy Advance SP screen dim but still working?
A dim but stable screen needs a display-type and brightness check before replacement. The original AGS-001 uses frontlighting, while the original AGS-101 uses backlighting; an IPS modification needs its own control instructions.
What should I check first if my GBA SP screen flickers?
Check the installed display and brightness control, then observe whether flickering coincides with resets or normal lid movement. Those observations guide power and display-connection checks without proving that the LCD has failed.
How many brightness settings does an original AGS-101 have?
An original AGS-101 has 2 brightness settings selected with the brightness button. An aftermarket screen can behave differently, so identify the installed display before relying on that control behaviour.
Can a loose ribbon cable cause a flickering SP screen?
A poor display-ribbon connection can interrupt the picture. Inspection requires the charger and battery to be disconnected, and a damaged cable or connector needs repair rather than repeated reseating.
Should I keep charging an SP with a swollen battery?
No, stop using and charging a Game Boy Advance SP with a swollen battery. Do not puncture or compress it; arrange safe handling and disposal through an appropriate battery service.
Will an IPS V5 screen fix every dim or flickering SP?
No, an IPS V5 screen does not repair unrelated power, switch or motherboard-connector faults. Diagnose the existing symptom before choosing a screen upgrade.
Does Retrofit repair Game Boy Advance SP consoles in Australia?
Retrofit offers Game Boy Advance SP repair and upgrade services for Australian retro gaming enthusiasts and collectors. Describe the installed screen, power behaviour and any lid-related flickering when discussing the repair.
What should I tell a repairer about a flickering SP in 2026?
Tell the repairer which display is installed and whether brightness changes, resets or lid movement reproduce the fault. Include previous modification history and stop using the console if its battery is damaged or swollen.
One last thing
Watch the game, not just the light. If sound continues and the game responds while illumination disappears, report that separately from a frozen image or a full console reset. That distinction makes your repair description more useful than calling every symptom a screen failure.