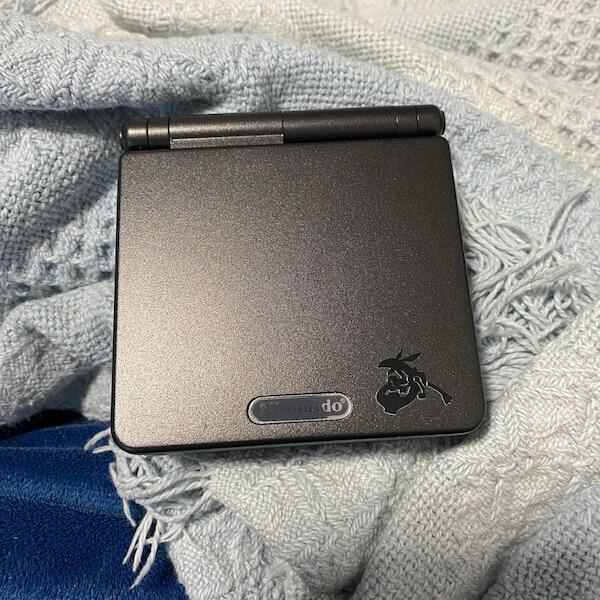

Yes, a yellowed Game Boy Advance SP shell can sometimes be improved, but the right treatment depends on whether you are seeing surface dirt, a damaged finish or discolouration within the plastic. Clean first: peroxide treatment is not a universal fix, and replacing a shell changes the console’s originality rather than restoring it.
- To restore yellowed Game Boy Advance SP shell surfaces, identify dirt, coating damage and plastic discolouration before choosing treatment.
- Gentle cleaning preserves more original material than abrasive polishing or chemical whitening.
- Peroxide cannot repair worn paint, cracks or damaged screw posts, and colour improvement is not guaranteed.
- Retrofit refurbished Game Boy Advance SP consoles suit players prioritising a rebuilt handheld over preserving their existing shell.
Can a yellowed Game Boy Advance SP shell be restored?
Sometimes—but restoring the original finish and making the console look different are separate jobs. Cleaning removes surface contamination; chemical whitening attempts to change discoloured plastic; a replacement housing removes the original shell from service.
Start with the least invasive option. The guide to cleaning a Game Boy Advance SP shell without damaging it covers the first step before you consider whitening or replacement.
| Approach | Best for | Main benefit | Main limitation |
|---|---|---|---|
| Gentle cleaning | Surface dirt and handling residue | Retains the existing housing and finish | Does not reverse ageing within plastic |
| Chemical whitening | Selected uncoated, discoloured plastic parts after assessment | Can reduce visible yellowing | Risks uneven results and damage; unsuitable for some finishes |
| Shell replacement | Cracked housings or a player-focused rebuild | Replaces the damaged exterior | Removes the original housing and requires careful disassembly |
| Leave unchanged | Collectors prioritising original condition | Avoids irreversible cosmetic treatment | Yellowing and cosmetic wear remain visible |
Why this matters
A cosmetic mistake can turn a usable original housing into a replacement-shell project. The SP’s folding construction also means a shell job involves more than removing an exterior cover: the hinge assembly and display ribbon need careful handling.
For a 2026 restoration, decide what you want to preserve before choosing a method. An original finish with visible ageing and a fresh aftermarket housing are different outcomes, even when both consoles play correctly.
Identify what has actually turned yellow
Yellow is a description, not a diagnosis. Inspect the shell in neutral light and compare exposed areas with protected edges, without prising apart the console just to check its colour.
Surface dirt and residue
Handling grime, smoke residue and old adhesive can change the appearance of a housing. Look for uneven deposits around buttons, seams and areas you regularly touch.
A barely damp cloth can help establish whether the colour is on the surface. If dirt transfers to the cloth, continue gently; if the cloth picks up the shell’s colour or the surface becomes tacky, stop.
Worn or discoloured coating
Some SP finishes have a surface coating rather than colour that looks identical throughout the material. Wear around edges and controls can expose a different-looking layer underneath.
Whitening plastic does not replace missing paint. Do not treat a worn metallic finish as though it were an uncoated pale housing, and do not assume the battery cover and main shell will respond identically.
Discolouration within plastic
Plastic ageing can produce colour changes that ordinary cleaning does not remove. Light, heat, material formulation and previous storage conditions all affect the appearance of ageing plastics.
A protected area retaining a different colour is a useful clue, not proof of a particular chemical cause. Avoid the blanket explanation that every yellow console contains the same additive or needs the same treatment.
How to assess a yellowed SP shell safely
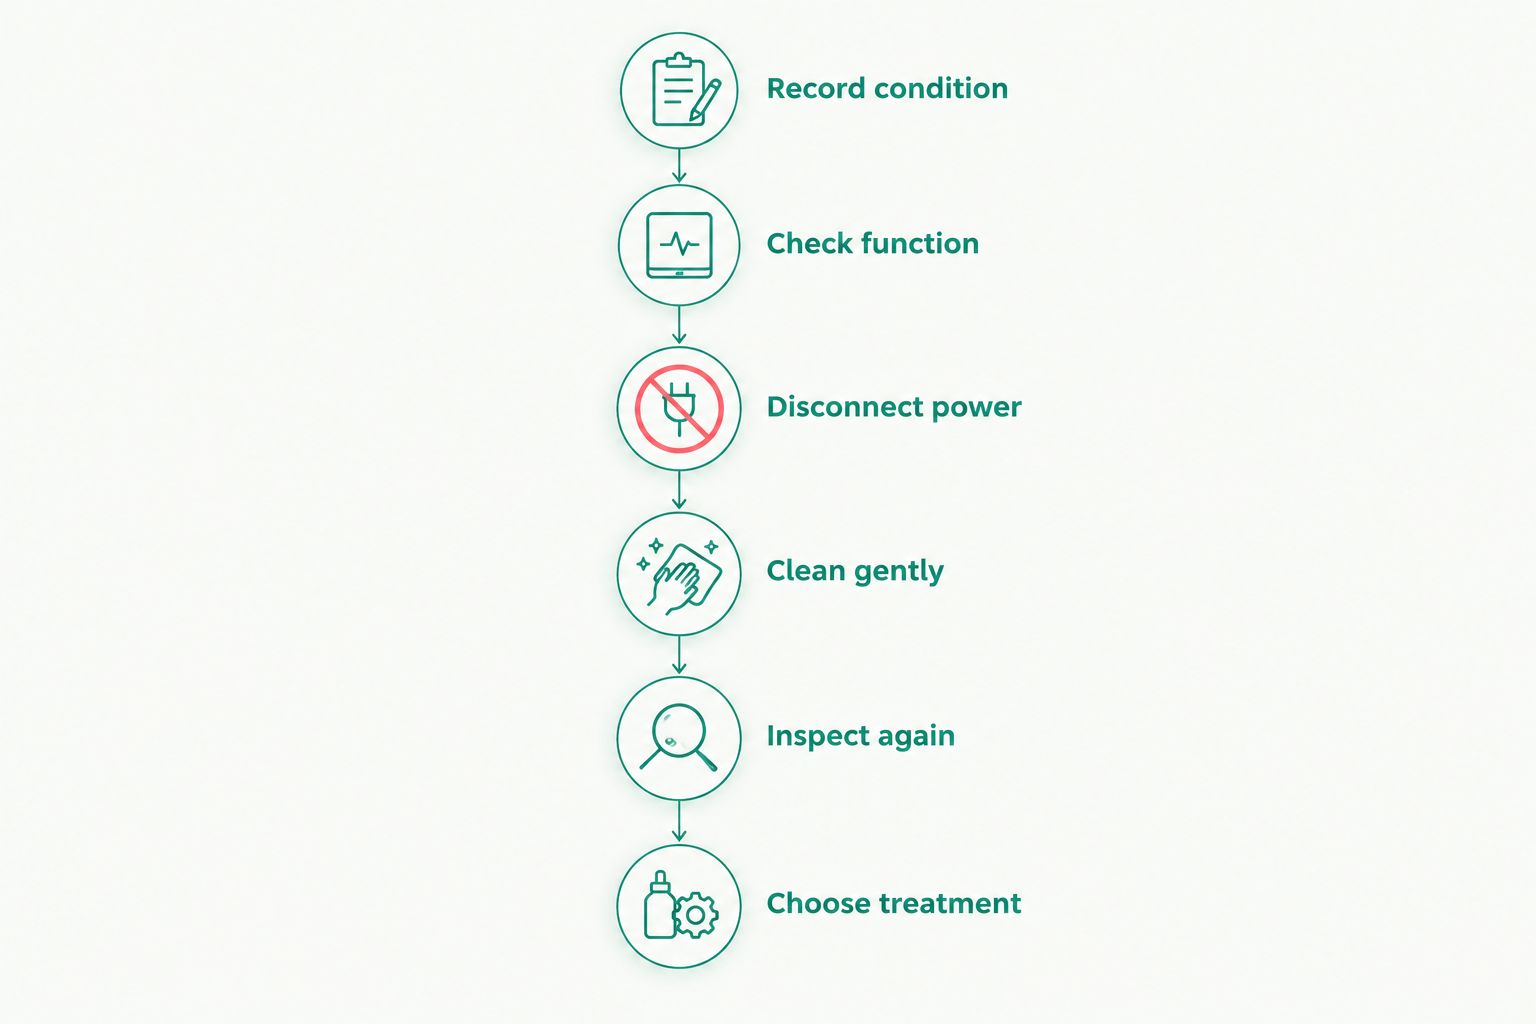
Use this sequence for your 2026 restoration plan. Each stage gives you a stopping point before the work becomes more invasive.
- Record condition. Photograph the lid, base, battery cover, labels and existing marks in consistent lighting. Record cracks and loose areas separately from colour changes.
- Check function. Before disassembly, check the screen, controls, sound and cartridge operation. Existing faults should not become mysteries after a cosmetic job.
- Disconnect power. Switch off, unplug the charger and remove the battery before further work. Stop if the battery is swollen, leaking or damaged; do not force it out or continue the restoration around it.
- Clean gently. Use a soft cloth that is barely damp, keeping moisture away from openings. Put cleaning liquid on the cloth, never directly onto the assembled console.
- Inspect again. Allow the exterior to dry and compare it under the same lighting. Decide whether remaining marks are contamination, finish damage or discoloured plastic.
- Choose treatment. Retain, seek specialist assessment or replace the housing according to its condition and your preservation goal. Do not escalate simply because cleaning has reached its limit.
The decision point comes after cleaning, not before it. A shell with sound plastic and an intact finish deserves a different approach from one with split hinge mounts or damaged screw posts.
Gentle cleaning: best for preserving the existing finish
Gentle cleaning is the first choice when the shell is intact and its originality matters. Start with a dry, soft cloth, then use minimal moisture only where needed.
For detached, suitable plastic parts, a mild detergent solution can remove grime, but electronics, batteries, screens, labels and assemblies need separate handling. An assembled SP is not washable, and a shell carrying attached components is not an empty plastic part.
Avoid treating every cleaning product as interchangeable. Strong solvents can attack plastics or coatings, while abrasive pads and polishing compounds remove surface material rather than simply lifting dirt.
Melamine cleaning sponges are abrasive too. They can alter gloss and printed details, so they are a poor default for preserving an original finish.
Stop when further cleaning starts changing the surface rather than removing contamination. A clean, aged shell is a better preservation result than a patchy shell scrubbed until the coating disappears.
Chemical whitening: best considered for assessed, uncoated parts
Peroxide-based treatment, often called retrobrighting, can lighten some yellowed plastics. It is a cosmetic treatment, not a repair for aged material, and it does not guarantee a permanent return to the original colour.
For an SP, the important question is whether the affected surface is suitable for treatment at all. Paint, printed decoration, adhesive labels and unknown replacement plastics complicate the decision.
Do not coat an assembled console in peroxide or put it into a liquid bath. Chemical treatment belongs only in an appropriately controlled process involving suitable detached parts, with protection and handling determined by the chemical’s safety instructions.
In 2026, an online before-and-after photograph is still not evidence that the same process suits your housing. Camera exposure and lighting also change how yellowing appears, making matched photographs essential when you assess results.
The drawbacks are substantial:
- Uneven appearance: different areas can respond differently.
- Finish damage: coatings and decoration introduce additional risks.
- Uncertain durability: a lighter appearance does not establish that yellowing will never return.
- No structural repair: cracked mounts and brittle sections remain damaged.
If retaining an original or decorated shell matters, seek conservation-minded advice before attempting irreversible treatment. There is no useful universal exposure time or concentration for an unidentified housing.
Shell replacement: best for damaged housings and player-focused rebuilds
A replacement shell is appropriate when the housing is structurally damaged or you value a different appearance more than keeping the original exterior. It is a housing replacement, not proof that the original yellowing has been reversed.
The SP’s hinge and display ribbon make this a precision job. Use a model-specific disassembly guide, organise screws by location and never pull the lid away while a cable remains connected.
Replacement-shell quality also matters. Check fit around the controls, hinge, charging opening and cartridge slot; a housing should not need force to close around correctly positioned components.
Do not use screw pressure to pull misaligned halves together. Reopen and find the obstruction instead, especially around the display cable and shoulder-button assemblies.
If you keep the original shell, store it with a record of the change. That preserves the console’s history and lets a future owner distinguish original parts from later additions.
When a refurbished console makes more sense
If your goal is playing rather than preserving this particular housing, a rebuilt console is another route. Retrofit refurbished Game Boy Advance SP consoles are best for players who want a rebuilt handheld rather than a cosmetic experiment on their existing shell.
Retrofit sells refurbished and modded Game Boy Advance and GBA SP consoles, alongside repair and upgrade services. The trade-off is clear: buying another console does not preserve your current console’s original exterior, so it is not a substitute for conservation when that is your priority.
Why restoration results vary
For a 2026 assessment, these factors matter more than a generic promise to make yellow plastic look new:
- Surface construction: moulded colour, paint and printed decoration require different treatment decisions.
- Type of discolouration: removable residue and colour change within plastic are different problems.
- Previous treatment: solvents, abrasive polishing or earlier whitening can alter the surface you are working on.
- Structural condition: cracks, damaged mounts and weakened hinge areas can make cosmetic work secondary.
- Storage history: exposure to light, heat and contamination affects both appearance and preservation decisions.
- Your intended outcome: preserving an original object and creating a fresh-looking daily player call for different compromises.
Will whitening make an SP shell original again?
Whitening does not make a shell untouched or factory-original again. It changes the appearance of the existing material, and it cannot recreate missing coating, lettering or moulded detail.
If you sell or document the console, describe the treatment accurately. Distinguish an original housing that has been chemically treated from an untreated housing and from a replacement shell.
Is replacing the shell better than restoring it?
Replacement is better for a badly damaged housing when your priority is a usable exterior; retention is better when preserving original material comes first. Neither choice is automatically right for every SP.
Inspect the hinge areas and screw posts before choosing on colour alone. A brightened shell with structural damage has not become a sound housing.
How do you stop a restored shell yellowing again?
Careful storage reduces avoidable exposure, but no cosmetic treatment guarantees that a shell will never change colour again. Keep the console away from direct sunlight, excessive heat and smoke, and store it clean and dry.
For your 2026 maintenance record, keep photographs under consistent lighting. Compare the same surfaces rather than relying on memory or photographs taken under different lamps.
FAQ
Can I restore a yellowed Game Boy Advance SP shell without taking it apart?
You can gently clean the exterior without a full teardown, but chemical whitening is not suitable for an assembled console. Keep liquids away from openings and disconnect power before cleaning.
Will hydrogen peroxide fix a yellowed Game Boy Advance SP?
Hydrogen peroxide can lighten some yellowed plastics, but it is not a universal treatment for Game Boy Advance SP housings. Coatings, decoration and the material’s condition determine whether treatment is appropriate.
Can I use a magic eraser on my SP shell?
A melamine cleaning sponge is abrasive and can change the finish or damage printed details. Use a soft cloth first when preserving an original shell matters.
Does yellowing mean my Game Boy Advance SP is broken?
Yellowing alone does not establish an electronic fault. Check the console’s operation separately, and inspect the housing for cracks or damaged mounting points.
Is a replacement shell still an original Nintendo shell?
An aftermarket replacement shell is not an original Nintendo housing. A console can retain original Nintendo electronics while having a replacement exterior.
Should I restore a decorated or collectible SP shell myself?
Preserve a decorated or collectible shell until you understand its finish and treatment risks. Irreversible cleaning or whitening can damage the features you want to keep.
Can Retrofit help if I want a refurbished SP instead?
Retrofit sells refurbished and modded Game Boy Advance SP consoles and offers repair and upgrade services. A refurbished console is an alternative to restoring your existing housing, not a way to retain that housing’s originality.
One last thing
A matching battery cover is not a reliable colour reference for the entire console. Its material, coating, exposure or replacement history can differ from the surrounding housing.
Judge each part separately before treating the set. Photograph what you have, preserve labels and original parts where practical, and choose the least invasive method that meets your actual goal.