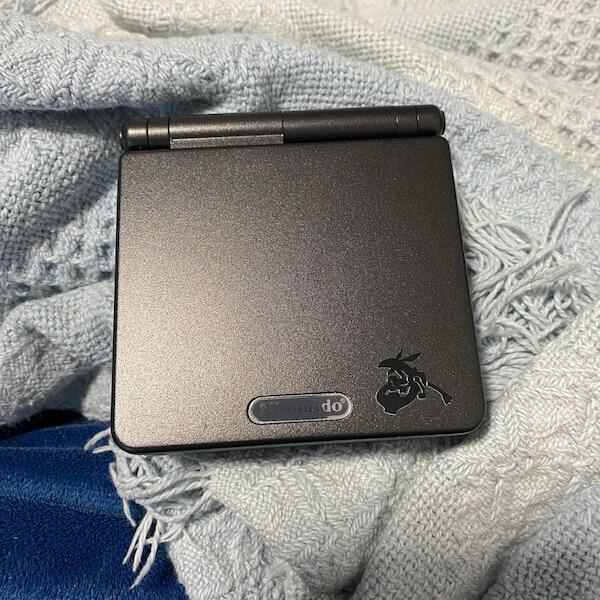

To restore yellowed Game Boy Advance SP buttons, start with gentle cleaning; wash removed plastic buttons separately if surface dirt remains, and replace them if you want to remove discolouration that cleaning cannot shift. Cleaning does not reverse worn colour or aged plastic, and peroxide treatment risks an uneven finish rather than a dependable restoration.
- To restore yellowed Game Boy Advance SP buttons, clean first and distinguish surface grime from permanent colour change.
- Replacement buttons suit daily-use restorations; retaining cleaned originals suits collectors who prioritise original parts.
- Retrofit offers Game Boy Advance SP repair services for Australian owners who prefer professional work.
How do you restore faded or yellowed buttons on a Game Boy Advance SP?
Clean first, assess the dry result, then decide whether to retain or replace the buttons. Do not start with bleach, abrasive polish or a peroxide bath: removing dirt and changing plastic colour are different jobs.
- Photograph the buttons and test their operation before opening the console.
- Switch off, unplug the charger and remove the battery before internal work.
- Clean accessible surfaces with a barely damp cloth, without pushing liquid into gaps.
- If necessary, remove the plastic buttons using a model-specific disassembly guide and wash them separately.
- Dry every washed part completely before reassembly.
- Refit, test and assess the colour under the same lighting as your original photographs.
If the surrounding shell also needs attention, follow the guide to cleaning a Game Boy Advance SP shell without damaging it. Treat the shell and buttons as separate surfaces rather than applying the same cleaner everywhere.
Why this matters
A yellow button is not automatically a dirty button. Surface deposits, changes within the plastic and worn finishes require different decisions; more scrubbing is not a solution to all three.
For a 2026 restoration, decide whether your priority is original material or a uniform appearance. Keeping cleaned original buttons preserves those parts, while replacements change the console's originality and require a fit check.
Appearance and operation also need separate tests. A pale button that responds correctly has a cosmetic issue; a button that sticks or misses inputs needs mechanical or electrical diagnosis as well.
Choose cleaning, preservation or replacement
Use the condition of the buttons—not the strength of the cleaner—to choose your method. Stop escalating the cleaning process once dirt is gone and the remaining problem is colour.
| Approach | Best for | Main benefit | Main drawback |
|---|---|---|---|
| Gentle cleaning | Buttons with surface grime | Removes deposits without deliberately changing the plastic | Does not restore faded pigment or reverse material ageing |
| Retaining cleaned originals | Collectors prioritising original parts | Keeps the existing buttons with the console | Visible yellowing or wear remains |
| Replacement buttons | Daily-use consoles needing a consistent appearance | Replaces discoloured or damaged plastic | Fit, colour and feel need checking; parts are no longer original |
| Peroxide brightening | Specialist cosmetic work accepting uncertainty | Can lighten some yellowed plastics | Results vary; uneven colour and surface changes are risks |
Peroxide brightening is not the default recommendation here. A treatment that changes the appearance of one plastic part does not establish that it is suitable for another button, especially when its material or finish is unknown.
Keep the original set if you fit replacements. Label and store it with the console's restoration records so a later owner can distinguish retained parts from replacements.
Inspect the buttons before using a cleaner
Look at the console in indirect daylight and photograph it before treatment. Avoid judging colour under a coloured desk lamp or comparing photographs taken with different white balance settings.
Surface grime
Check the edges of the D-pad, the button recesses and the borders around A and B. Dirt often collects where fingers contact the plastic and where the button meets the shell.
A gentle wipe that visibly removes residue supports further cleaning. Stop if the cloth picks up the button's finish or the surface becomes tacky.
Discolouration
Compare exposed surfaces with protected areas once the button is removed. A colour difference is useful evidence of uneven exposure, but it does not identify the plastic formulation or prove that a chemical treatment will work.
Take your 2026 reference photographs before changing anything. They give you a consistent record of the starting condition, including existing scratches and colour differences.
Worn finish
Look for polished contact areas, missing surface colour, scratches and damaged markings. Cleaning removes deposits; it cannot replace material that has worn away.
Do not confuse a cleaner-looking surface with a restored finish. If the button is clean but visibly worn, preservation or replacement is the next decision.
Clean assembled buttons without flooding the console
Start with the least invasive method. Switch the console off, disconnect charging equipment and remove the battery before cleaning around openings.
Use a soft, lint-free cloth barely dampened with water. Wipe the exposed button faces gently, keeping the cloth away from openings where moisture could enter.
For loose debris along an edge, use a clean, soft brush without forcing bristles deeply into the gap. Do not spray cleaner directly onto the console or pour liquid around the buttons.
Avoid acetone, nail-polish remover, abrasive powders and abrasive cleaning sponges. These are poor choices for preserving an unknown plastic finish, particularly around lettering or decorated surfaces.
If surface wiping is not enough, remove the plastic part rather than adding more liquid. Cleaning an assembled console by soaking its button gaps introduces moisture where you cannot inspect or dry it properly.
Remove and wash plastic buttons separately
Opening a Game Boy Advance SP exposes parts that are easier to damage than the buttons themselves. Use a model-specific disassembly guide, correctly fitting drivers, a screw organiser and a clear work area; this cleaning sequence does not replace a complete teardown guide.
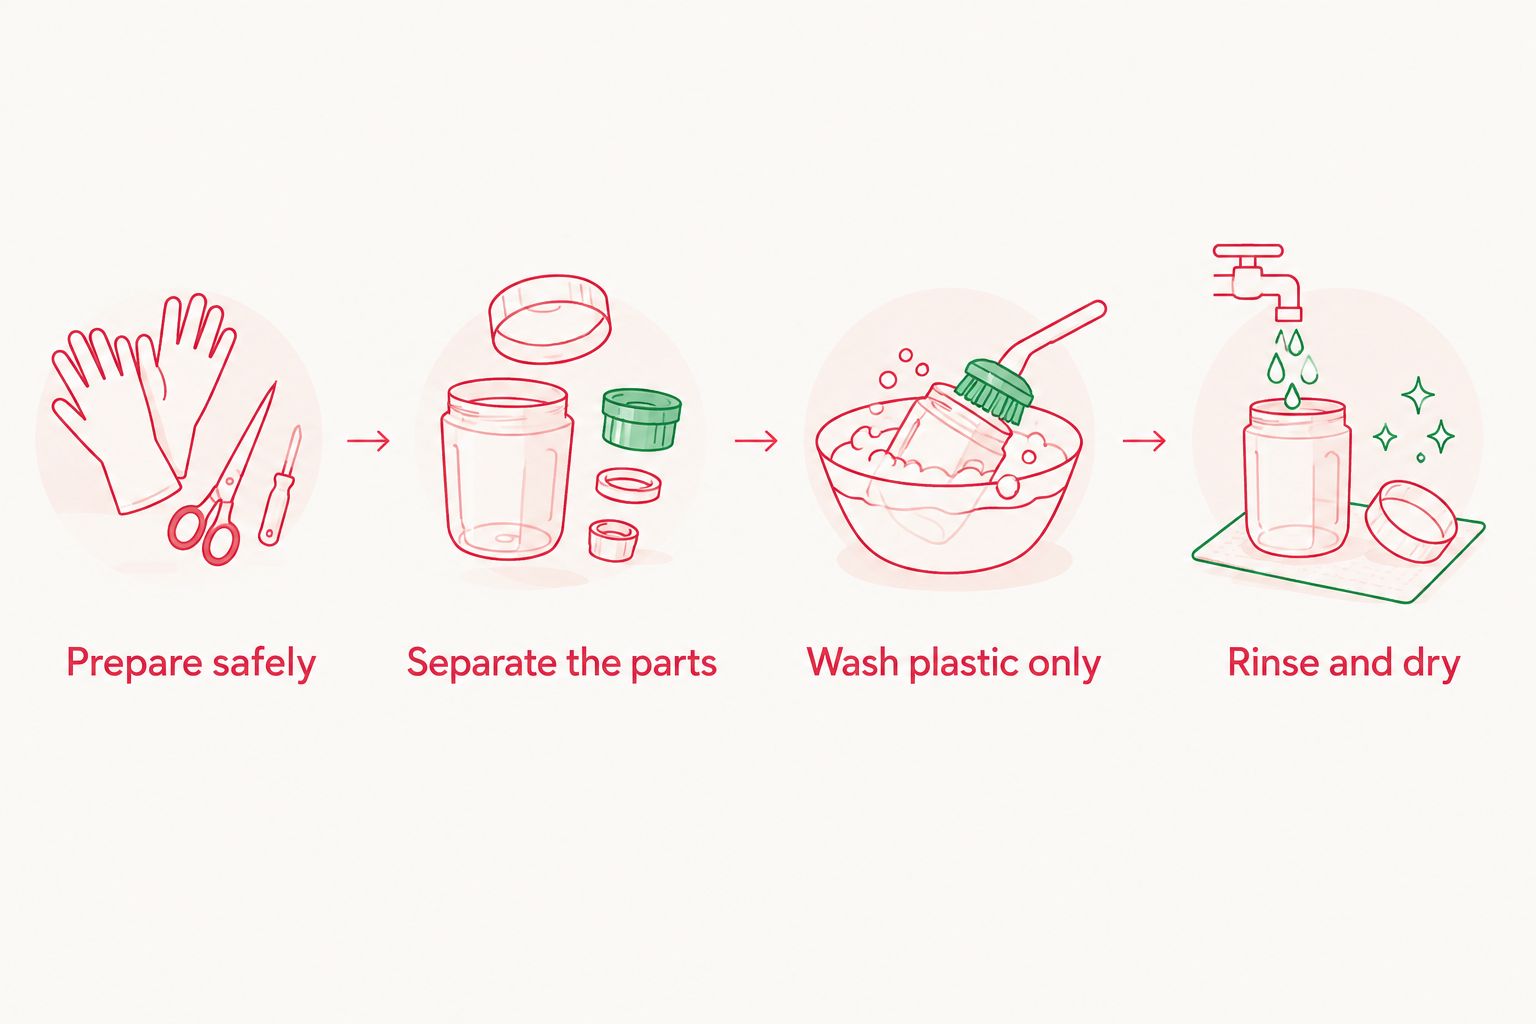
Prepare safely
Remove the cartridge, disconnect the charger and take out the battery. If the battery is swollen, leaking or damaged, stop and arrange appropriate battery handling rather than continuing the cosmetic repair.
Photograph each stage and keep screws grouped by location. Do not assume screws that look similar are interchangeable.
Separate the parts
Access the controls only as far as the disassembly guide requires. Protect the display ribbon cable, connectors and any added wiring in a modified console; stop if the assembly differs from the guide.
Keep rigid plastic buttons separate from rubber membranes, electronics and metal mechanisms. Shoulder controls need particular care because loose mechanical parts are easy to misplace.
Wash plastic only
Clean removed, undecorated plastic buttons with lukewarm water, mild dishwashing detergent and a soft brush. Work gently around edges and recesses rather than scrubbing the visible face aggressively.
Do not place the motherboard, switches, battery, speaker or assembled console in the wash water. Do not assume a coated, painted or decorated replacement button tolerates soaking; follow its material-specific care instructions instead.
Rinse and dry
Rinse detergent from the washed plastic and inspect the undersides for residue. Let every recess dry completely before returning parts to the console.
Do not use an oven, heat gun or direct heat to accelerate drying. A fixed drying time is not proof that a hidden cavity is dry.
Why button restoration results vary
The same cleaning method does not produce the same colour result on every console. These factors determine what you can reasonably expect:
- Surface deposits: Dirt can come off; a colour change within the plastic does not wash away.
- Existing finish: Painted, printed or coated surfaces need different care from undecorated plastic.
- Previous exposure: Uneven exposure can leave visible differences between protected and exposed areas.
- Physical wear: Scratches and polished contact areas remain after dirt is removed.
- Part history: Original and aftermarket buttons do not necessarily share the same material or finish.
- Replacement fit: A visually matching button still needs to move freely in the particular shell.
For replacement parts bought in 2026, check the stated console compatibility and inspect the actual parts before installation. A listing photograph alone cannot confirm button travel, moulding quality or fit with your shell.
Should you use peroxide to whiten GBA SP buttons?
Peroxide is not the first-choice treatment for Game Boy Advance SP buttons. It can lighten some yellowed plastics, but that does not guarantee the original colour, an even result or preservation of the surface finish.
Do not apply peroxide cream to an assembled console or place the console under a lamp for brightening. Electronics, coatings and neighbouring materials should not become part of an uncontrolled cosmetic experiment.
There is no universal treatment duration appropriate to unidentified buttons. If retaining original material matters, clean the buttons and accept remaining discolouration rather than treating a stronger chemical process as routine maintenance.
Can faded button colour be restored by cleaning?
Cleaning cannot replace faded pigment or a worn coating. It can reveal colour hidden beneath grime, but a clean, faded button is still faded.
Avoid polishing until the surface looks shiny: removing more surface material is not the same as restoring the original appearance. Choose cleaned originals for preservation or suitable replacements for a more consistent finish.
Will replacement buttons fix sticking or missed inputs?
Replacement buttons fix neither every sticking problem nor every missed input. A damaged plastic button is only one possible cause; shell interference, a displaced membrane or an electrical fault requires a different correction.
Before changing parts, record which controls fail and whether the fault depends on pressure or direction. That separates a cosmetic restoration from an input repair and helps prevent replacing a part that was working correctly.
Reassemble and test before calling the job finished
Check that every button sits correctly and returns freely before tightening the assembly fully. Never use screw pressure to force a misaligned button or membrane into place.
After complete drying and reassembly, test the 2 face buttons, A and B, independently. Check all 4 D-pad directions, Start, Select and both shoulder controls in software that responds to those inputs.
Use these final checks:
- Movement: Each control travels and returns without rubbing against the shell.
- Response: Normal presses register consistently without needing excessive force.
- Assembly: The shell closes naturally, with no trapped parts or cables.
- Appearance: Compare the dry buttons with your starting photographs under matching light.
Record the finished condition in your 2026 restoration notes. Keep a list of replaced parts, not just a photograph of the finished console.
When professional repair makes more sense
Retrofit is best for Australian Game Boy Advance SP owners who want professional repair rather than DIY disassembly. Its repair and upgrade services are relevant when cosmetic work overlaps with sticking controls, damaged parts or an unfamiliar modified assembly.
Ask Retrofit whether retaining your original buttons is practical and what work the console needs. Professional repair avoids making disassembly your responsibility, but it does not make a chemically aged button's original colour recoverable.
For a 2026 repair request, provide clear photographs and describe input faults separately from colour concerns. State whether your priority is original parts, appearance or everyday playability.
FAQ
What's the safest way to restore yellowed Game Boy Advance SP buttons?
Start with gentle cleaning and assess the fully dry result before choosing further work. Wash detached plastic buttons separately if needed; retain or replace them when the remaining problem is discolouration rather than dirt.
Can I clean GBA SP buttons without opening the console?
You can wipe exposed button faces with a barely damp, soft cloth without opening the console. Do not spray cleaner into gaps or try to soak away dirt inside an assembled handheld.
Will dishwashing detergent remove yellowing from GBA SP buttons?
Mild dishwashing detergent removes surface deposits, not colour changes within aged plastic. Use it on suitable detached plastic parts, rinse away residue and dry completely before reassembly.
Is peroxide better than replacing yellowed buttons?
Peroxide is not the dependable choice when you want a consistent finish. Replacement avoids chemically treating the original buttons, but replacement fit and feel still need checking.
Can I use nail-polish remover on faded buttons?
Do not use nail-polish remover on Game Boy Advance SP buttons. Solvents such as acetone can damage plastic and finishes rather than restore them.
Should I keep the original buttons after fitting replacements?
Keep the original buttons if originality matters to you or a future owner. Store them with a record identifying which parts were changed.
Can Retrofit help if the buttons also miss inputs?
Retrofit offers Game Boy Advance SP repair and upgrade services. Describe the missed inputs separately from yellowing so the repair request distinguishes function from appearance.
One last thing
A clean original button with some yellowing can be a better restoration choice than a bright replacement that binds. Test movement and input response before judging the job by colour alone.
Keep your original parts and photographs together. That small record preserves the distinction between cleaning, replacement and cosmetic alteration long after the console is back in use.